Foundation - a fundamental element for any home. The foundation of a residential building will ultimately depend on how competently, in compliance with numerous strict rules and norms, the life of the building itself will depend. There are many types of foundations that are used for the construction of structures of various types and scales. But one can hardly argue with the fact that the most reliable and strong foundation is the foundation plate.
The tile, monolithic base is suitable for the construction of almost any house - not only one-story, but also two-story. However, the cost of its construction by professionals is very high: sometimes the cost of work can be up to a third of the total cost of the entire building.
But in case you are confident in your abilities and want to save money, if you follow all the rules, you can make a foundation slab with your own hands. For a house of brick, aerated concrete, wood and other materials, this option will be more than appropriate.
Advantages of the slab base of the house:
- suitable for buildings of different number of storeys (one-, two-story cottage, etc.), area, purpose, materials used in the construction;
- optimal in homes where basement construction is expected;
- lags on the floor in the future will not have to be laid: the final floor can be done on a monolithic slab;
- the base of the house is solid, reliable, earthquake resistant;
- the area and thickness of such a base for a residential building is large enough, the risk of washing with water is minimal;
- the base of the tile type is optimal in areas with complex soil.
The slab for the foundation of the house can be made either flat or ribbed. It will be more difficult to create a ribbed one with your own hands, however, its functional characteristics are slightly better. The fact is that it is the ribbed plate that best resists the loads that the building will exert on it. Therefore, for a large two-story house, you can choose this particular type of foundation.
To create such a foundation with your own hands, the rib system is initially poured, and then the plate itself. The space between the edges of the base is filled with sand or a mixture of sand and gravel. In the event that the soil conditions are not extremely difficult for you, and the building is supposed to be built small or medium, it is worth giving preference to a flat monolithic slab.
Creating a foundation with your own hands: the main stages of work
Step 1. Preparation of the soil base. The relief of the area where the foundation will be created is leveled, soil is poured, and then it is carefully rammed with a vibrating platform.
Step 2. Marking - the optimal thickness of the base, its length, width is determined. At a depth of about 30 cm, the soil is taken out, the so-called "trough" is arranged for the upcoming filling.
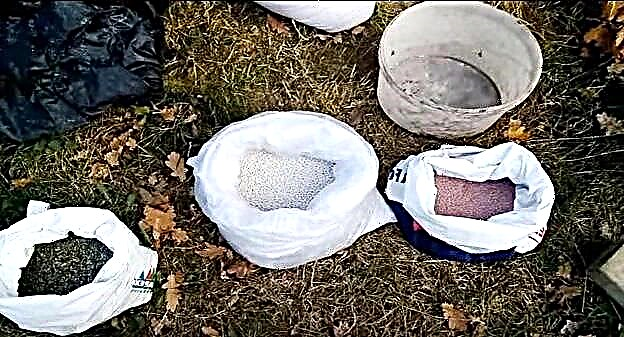
Step 3. After the thickness of the future foundation is ensured, the bottom of the resulting “trough” is covered with a special material - geotextiles. He perfectly holds the backfill of sand and gravel, and at the same time - lets water pass in only one direction, diverting it from the foundation. In order to make the drainage better, trunk trenches are arranged under the resulting recess. The resulting drainage trenches are also lined with geotextiles. Plastic corrugated pipes for drainage are laid in the gravel litter, they will discharge water into the drainage trenches.
Step 4. After laying the special geotextile material, a sand and gravel mixture is poured into the “trough”. The surface is spilled with water and again well rammed with a vibrating platform. Material for waterproofing, for example, polyethylene (its thickness should be sufficiently large), is laid on top of the resulting crushed stone pillow. Then extruded polystyrene foam is laid.
Step 5. We assemble the formwork.
If you do this work with your own hands, pay attention: it is also advisable to cover the formwork with a layer of polyethylene: in the future, this will avoid such a problem as “leakage” of concrete milk, which means that the filling process will be much easier and faster.
You can use a fixed formwork made of polystyrene foam, it is great for building an insulated base, the thickness of which is up to 25 cm, and also for arranging a "warm" blind area around a residential building.
Step 6. After the formwork is mounted, you can start knitting reinforcement. The distance between the layers of the reinforcing mesh is 10-12 cm. After that, “fungi” are installed between the layers - special clamps designed for reinforcement.
In order to carry out the installation of the reinforcing mesh with your own hands, a special scrap will be required, and the use of a jack will also be required. It is important that the plate of reinforcement joints has a minimum amount - the smaller the more reliable the knitting will be.
Step 7. We reinforce the end ends of the monolithic slab with special elements in the shape of the letter “P”. They connect two levels of reinforcement with each other. When doing reinforcement with your own hands, the minimum length of such elements is determined by a simple formula: the thickness of the plate, multiplied by two.
Transverse "U-shaped" reinforcement (clamp) is placed on the end sections of the plate.
Step 8. We make reinforcement of the foundation slab: we install additional reinforcement on the columns, on the walls and supports. In order for the reinforcement consumption to be less, it is possible to make the minimum reinforcement (provided for by building codes and rules) over the entire area of the slab, and in those areas where the load is maximum, add additional reinforcement. True, in this case, the work will be more time-consuming. Particular emphasis is on the reinforcement of each internal corner in the slabs, as well as on the reinforcement of openings in the slab.
Step 9. Fill the monolithic slab. This will require concrete grade M350-M450. Concrete with good water resistance should be used, at least W6. Concrete is supplied to the site from the mixer along the tray, and it is first scattered on the far side of the base and then the near edges are concreted. If you do this work with your own hands, find helpers: several people should fill it. One is engaged in the distribution of concrete, the other - processes the feed mixture using a special deep vibrator. This ensures uniform thickness of the base and high-quality penetration of the concrete mixture throughout the entire volume of the base plate. The surface is thus leveled, air bubbles are eliminated.
Step 10. After the work is completed, it is necessary to let the concrete set and the next day carefully pour the slab with plenty of water. If the creation of a tiled foundation with your own hands is carried out in hot weather, you should definitely cover the base with a dense plastic film - this will avoid cracking the surface.
Work on the construction of the building can be continued when the concrete gains at least seventy percent of the strength. If the ambient temperature in the daytime and at the exact time does not drop below 20 degrees Celsius, you need to leave the foundation for 10 days, and at a temperature of no more than 10 degrees Celsius you will have to wait twice as long - 20 days.
By giving preference to a slab foundation, you provide a reliable foundation for a cottage - one-story or two-story. Follow all the points of work in accordance with the rules, use high-quality materials, and your home will indeed become a real fortress for you!