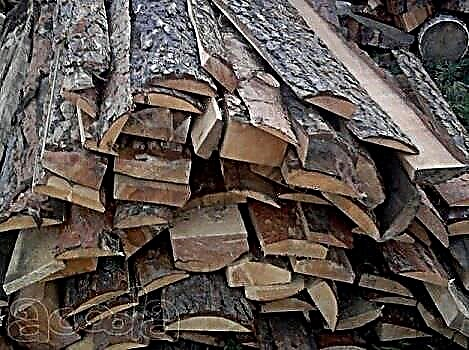
The walls, floor and ceiling of a balcony or loggia are exposed to extremes of temperature and humidity. A wood plank with a spike / groove connection is the perfect finish for this room. Once a renovated and clapboard-lined balcony for many years does not require time and investment for repairs. The lining of the loggia is also recommended (wood material is immune to temperature changes and extremely durable).
The photo shows the options for finishing the balcony.
Mounting Features
For installation, a supporting frame is always used - a lath, providing ventilation of the wrong side and even laying of boards. A feature of the installation is the free fastening not through the body, but with the help of metal clamps, which press the lower shelf of the lock to the base. The cladding elements are thereby given freedom to expand. With proper work on the wall, cracks, waves, and other deformations do not form. The front surface remains clean, all fixing elements are hidden. When using kleimers, plugs and puttying are not needed; they are overlapped by the next panel.
The distance between the supporting profiles of the frame is 40-60 cm. The direction of the lamellas can be horizontal or vertical. The second type is well suited for baths - compensation grooves well absorb moisture. With a horizontal external cladding, the groove is located below and this eliminates the ingress of moisture into the castle. Using horizontal installation, it is possible to sheathe wooden and metal partitions, to wall walls of frame buildings directly on racks.
Euro lining panels are installed with a compensating gap, the inner and outer contact angles are closed with additional elements made of wood.
Work stages
Eurolining is so technically refined material that it can be installed independently. The key to success is the study of detailed instructions and the availability of a set of tools, then laying the lining with your own hands will become the pride of a home master. Consider the installation of lining on the example of finishing the balcony.
Work stages
1. Preparation
First of all, you need to select a tool and purchase material.
Tools you will need:
- hammer drill;
- screwdriver;
- a hammer;
- jigsaw;
- nails or kleimers;
- steel screws on wood (35; 60 mm or 75 mm);
- vapor barrier;
- insulation (if necessary);
- level, mounting thread.
Purchase the required number of lining:
Before you begin installing eurolining, you need to determine the amount of material. It is enough to simply calculate the area of all surfaces on which the lining panels will be laid.
Material must be purchased with a margin (it is better to take more by about 10-15%).
Choose the length of the lining so that then there is a minimum of scraps.
2. Installation of electrical wiring
Work begins with the arrangement of electrical wiring, if provided. While this work is ongoing, the wood paneling, which is sensitive to changes in humidity, is tracked and acclimatized.
3. Wall alignment
In order for the lining to lie perfectly on the surface, you must first align the walls.
4. The collection of the frame-lathing for the installation of lining
For the frame, bars of 50 × 40 mm or 50 × 30 mm are used. They are attached to the wall with screws at a distance of 40-60 centimeters from each other. If there are irregularities in the wall, the lathing is leveled with the help of special linings for the bars (linings are used strictly under self-tapping screws). The lathing is carried out with strict observance of vertical and horizontal, its wooden parts are treated with fungicidal agent (Senezh).
5. When the frame is ready, the space between it and the wall is filled with insulation.
6. On top of the insulation with a stapler, vapor-insulating material is fixed to the bars of the frame. It will protect the tree from decay.
7. The next stage is the installation of lining boards. Having cut the details of the desired length, they are fixed with clamps, brackets or nails. Wall decoration starts from the corner.
- The first board must be installed perfectly evenly to set the exact laying direction of the entire room. We begin the installation with a comb in the corner (in this case, the groove will remain open, and it will be possible to hammer in the finish nails or screw the screws into it). Thus, each subsequent plank with a crest covers the place of attachment to the frame of the previous board.
- The top and bottom of each panel can be attached to the open (always closer to the edge). This is done so that the heads can subsequently be decorated with a ceiling cornice and baseboard.
- If, upon completion of laying all the boards, the latter does not fit completely into the corner, the excess part is sawn off with a jigsaw. If the house is new, then during installation it is necessary to take into account the possible extent of its shrinkage. It is also necessary to keep in mind the expansion of the boards as a result of increased humidity. For this purpose, in the upper and lower parts it is required to leave gaps of 15 - 20 mm in size, which later will be closed with skirting boards.
8. Registration of openings
Slopes of doorways and windows can be finished with a plastic or wooden corner.
9. The final stage - staining or applying varnish. You can do this work with a roller or brush. As a coating, you can use:
- acrylic paint;
- silicate coatings;
- silicone paint.
We were convinced that the lining is a fairly easy-to-install material, and it can be mounted without special difficulties with your own hands, even without special skills. This will provide an opportunity to significantly save on the work of finishers, which, accordingly, will reduce the total cost of repairs.
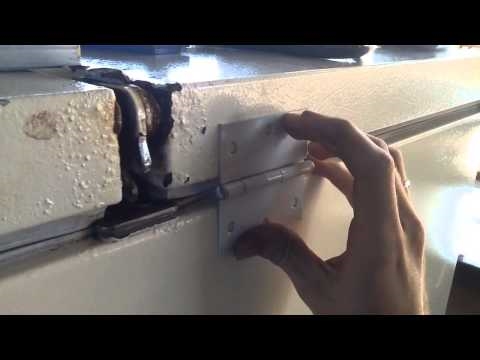
Mounting the lining on the wall. Video clip demonstrates the nuances of installation work.
Ceiling decoration
Lining is also widely used for decoration of ceiling structures. This material has a relatively low weight, and therefore is easy to install and excellently holds on any surface, including the ceiling.
The video clip will help you visually familiarize yourself with the sequence of actions for installing the lining on the ceiling.